Search This Blog

Showing posts with label baking. Show all posts

Thursday, July 28, 2016

A Swedish Tea Ring

After all the fibre stuff over the last few weeks  I thought it was about time that I had a change and baked something ~ so here's a very easy Swedish Tea Ring. This is quite a versatile recipe, you can use any filling you want, the possibilities are endless, in this one I used raisins, craisins and chopped glace cherries. Another version I make is lemon curd & sultanas, I've also made it (on request) with nutella and chocolate chips as the filling. The dough recipe is easy and gives a light, soft, sweet dough.


Ingredients:
50g unsalted butter, at room temperature
500g strong white flour
1 x 7g sachet of instant yeast
7g salt
40g caster sugar
230ml milk
2 large eggs


For the filling:
2 tablespoons of butter, melted
2 tablespoons brown sugar
1/2 teaspoon cinnamon
100g dried fruit, raisins, craisins etc

1 Rub the butter into the flour, rubbing it in with your fingertips until integrated.


2 Add the yeast, stir, then add the salt and sugar. Heat the milk very gently until luke-warm, whisk in the eggs, and pour this into the dry mixture. No point messing around with a spatula here just use your hands to mix the dough so that it comes together in the bowl.
3 Tip the dough on to a clean work surface and knead well, for about 10 mins, or put it in a stand mixer with the dough hook attachment and knead for 5 mins.


Let the dough rest for 10 minutes then roll it out quite thinly into a rectangle. Brush over the melted butter, sprinkle over the brown sugar and cinnamon, then the dried fruits and finally roll it up nice and tight, swiss roll style. Curve it into a ring and tuck one of the ends inside the other pinching it together as best you can. Place it on a baking tray lined with non stick paper. Make slashes all around the outside using either a very sharp knife or a pair of sturdy kitchen scissors.


Cover with oiled cling wrap and leave it to rise in a warm place or about an hour. It will looked puffed up and the slits you cut will have opened up considerably.
Heat the oven to 200 deg C. Bake the ring for about 20 - 25 minutes. Cool on a wire rack. Decorate it with a simple water icing if desired.


Wednesday, May 18, 2016

A Trio of Tea-Time Bakes....

Yes, I've been baking again, I didn't bake all these cakes today, these are what I've made over the last week. Morning teas, afternoon teas, weekend visiting, there's always an excuse to bake in my house.

These are some of my favorite things ~ there's a Yorkshire Tea Loaf, which I have posted about before on here, but this recipe is slightly different and gives a nicer loaf in my opinion.

Secondly there's the ever so naughty Jam Donut Muffins that really do taste like a jam donut but must be far healthier than a deep fried version, these won't last two minutes, believe me.

Last but not least is the English Walnut Cake, because it's walnut season. I sat and shelled 5 kg of them over the last few evenings. I love walnut & coffee cake, or walnut & maple syrup cake, but sometimes it's nice to bake a plain cake and let the flavour of just one ingredient shine through, in this case the humble walnut. It doesn't need icing or frosting or buttercream, it's lovely as it is without all that.


Yorkshire Tea Loaf:
275g mixed dried fruit soaked overnight in 400ml fresh hot tea (any kind of tea will do)
75g Glace cherries Halved
70g soft brown sugar
2 large eggs
1 teaspoon mixed spice
270g self raising flour

Oven pre-heated to 150 deg C

you will need a greased and lined 2lb loaf tin

Soak the fruit overnight, the next day stir in the sugar and spice. Then beat in the eggs and mix well, next add the cherries. Sift in the flour and mix quite vigorously until it looks well combined. Pour the mixture into the tin and bake for 90-100 minutes. It will be well risen, golden brown on top and should feel firm when you press it in the middle. Cool in the tin for 30 minutes, then turn it out onto a wire rack to cool. This is lovely cut into thick slices and spread with salted butter. It will keep well for a few days in an airtight container or you can wrap it in foil and freeze it.


Jam Donut Muffins:
300g Self Raising Flour
150g caster sugar + 100g extra for coating
80 ml vegetable oil
1 large egg
175 ml buttermilk
1 teaspoon vanilla extract
Jam, about 9 teaspoons (strawberry or raspberry is best)
100g melted butter
1 teaspoon cinnamon

Pre-heat the oven to 180 degC, 375 deg F, Gas Mark 4. Grease a muffin tin, the recipe usually makes 8-9 cakes.

Mix the flour and sugar with a pinch of salt in a mixing bowl. In a large jug mix the oil, buttermilk, egg and vanilla extract. Pour the wet into the dry and mix very gently, you only want to combine the two, don't beat the life out of it or your cakes will be tough. If it's still a little lumpy that's fine, it will all work out int he end.

Put a heaped teaspoon full of cake mixture into the bottom of the muffin cups, you need to completely cover the bottoms of the tin with it, then add a teaspoon of jam into the centre and top with a further heaped teaspoon of cake mixture. The tins should be about 2/3 full. The trick is to make sure the jam is fully enclosed within the cake mixture so that it doesn't boil out.

Bake for 20 minutes, they will be well risen and golden brown. Let them cool in the tins for 5 minutes, then pop them out onto a wire cooling rack.

Mix the remaining sugar together with the cinnamon. Brush the cakes with melted butter and roll them in the sugar/cinnamon mix. These are best eaten within 24 hours of baking, but I bet they won't last that long!


Walnut Cake:

Use either a regular size loaf tin, 2 mini loaf tins or a 6" round cake tin, greased and lined.
Pre-heat the oven to 180 deg C, 375deg F, Gas mark 4.

110g self raising flour
1/2 teaspoon salt
125 g soft unsalted butter
80g caster sugar
2 large eggs
2 tablespoons milk
60g walnuts, ground finely in a food processor or finely chopped by hand
Extra walnut halves for the topping

Cream the butter and sugar until very pale and fluffy, about 4 minutes with an electric mixer. Add the eggs one at a time, beating well in between.

Sift the flour and salt together. Stir in the walnuts then add this to the butter and egg mixture, folding it in whilst adding the milk. Mix well to combine. Put the mixture into the tin and level the surface, decorate with walnut halves.

Bake times depend on which tin you use ~ my 6" round cakes take 40 minutes to cook, the mini loaf tins 30 minutes and the regular loaf tin 45-50 minutes, but which ever tin you are using start checking after 30 minutes. The cake will be golden brown, risen and feel firm in the centre when cooked. It needs no other adornment:


Friday, May 13, 2016

Cupcake Success

Gingerbread cupcakes with lemon cream cheese frosting, for a birthday morning tea:


After the Bundt cake disaster the other day, well these little cupcakes came out just perfect. I piped the roses on top with a 2D flower nozzle and added a cube of crystallised ginger at the centre. The recipe is here.


I've been knitting bed socks to help out a friend who needs 40 pairs to gift to International Exchange Students. They are fairly quick to knit as they are made in DK weight wool and are all garter stitch, but the legs seem mighty long to me for bed socks, these will possibly be almost knee length. These are knit in Naturally 8 ply wool, I'm onto the second pair which are being knitted in grey Gotland wool. Nice T.V. knitting.

Wednesday, May 11, 2016

When it all goes wrong.....

Here's todays effort ~ almond & cherry bundt cake. It all went wrong, but I wanted to show it so you know that my baking is sometimes a failure. I did a pretty good rescue job on it. A shame because this is a really lovely cake and I have used that tin more times than I can remember and have never had an issue with it. This is a very traditional English kind of cake and is quite moist and not too sweet. When you have mixed it up it will seem to be quite a thick consistency, that's how it's supposed to be.

The cake, fresh from the oven ~ I greased the tin with melted butter using a pastry brush, popped it in the fridge for a few minutes and greased it again, then floured it generously. Baked then cooled in the tin for 10 minutes.


The top if the cake was left behind in the tin! Never mind, I can patch this up.


A bit of almond flavoured glace icing drizzled over and the top scattered generously with toasted flaked almonds.


There we go ~ I don't think anyone will really notice. Crisis over.


Cherry & Almond Bundt Cake

You will need a 23cm bundt tin, well greased and floured (see pics above).

For the cake:
150g glace cherries, quartered
225g self raising flour
175g soft unsalted butter, plus extra for greasing the tin
175g caster sugar
50g ground almonds
3 large free range eggs
1 teaspoon almond extract

For the decoration:
175g icing sugar
water
15g flaked almonds, toasted
few drops almond extract

Pre heat the oven to 180deg C, 350 degF, gas mark 4.

Cream the butter for a minute or so, then add all the other cake ingredients to the bowl except for the cherries. Beat for a minute until smooth.

Spoon half the mixture into the tin and smooth it out as best you can, sprinkled the quartered cherries over the top of then put the rest of the cake mixture over the cherries, gently spread it evenly with the back of a spoon.

Pop it into the oven and bake for 35 - 40 minutes, it will be golden brown, well risen and feel pretty firm when you press it with a finger.

Leave it to cool in the tin for 10  minutes, then run a flat bladed knife around the sides of the tin. Lay a wire rack over the top of the tin and quickly invert the cake. I find a sharp tap on the bottom of the tin will (usually) release the cake. Let it cool completely, then mix the ingredients for the icing together, using just enough cold water to give a nice smooth and thick consistency. Drizzle it over the cake and sprinkle with the flaked almonds.

Sunday, May 1, 2016

Cinnamon Rolls with Cream Cheese Glaze

I seem to be on a bit of a bread making drive at the moment. Last week Pitta breads, this weekend I made fruited buns and today cinnamon rolls. Here's the recipe, it's quite a long one, but most of the time you aren't actually doing anything:


For the rolls:
2/3 cup milk
1 package active dry yeast (or 2 1/4 tsp)
6 Tbsp unsalted butter, room temperature and cut into small pieces
1/4 cup sugar
3/4 tsp salt
1 large egg
3 cups plus 2 Tbsp high grade flour

For the Filling:
50g butter, melted
2 Tbsp cinnamon
1/2 cup soft brown sugar

For the Frosting:
100g cream cheese
50g soft butter
1 cup icing sugar, sifted
1/2 teaspoon vanilla extract

Warm the milk and sprinkle the yeast over it, let it sit until it begins to get foamy. About 5 minutes

In the bowl of a stand mixer, stir together the butter, sugar, salt, and egg.

Fit the mixing bowl onto the mixer with the dough hook. With the mixer on the lowest setting, pour in the milk/yeast mixture and the flour. Increase speed to medium and let the dough knead for about 5 minutes until it forms a soft sticky dough. The mixture will seem quite wet at first, but will form a smooth soft dough once kneaded. If the mixture is too wet after kneading, add more flour a little at a time until a soft but sticky dough forms.

Let the dough rest, covered with a damp tea towel for 10 minutes.

Roll it out into a rectangle approx 15 x 10".

Brush with the melted butter and sprinkle over the brown sugar and cinnamon. You can add a cup of dried fruit at this stage if you like.

Roll the dough tightly into a large tube starting at the wide side. Pinch the dough shut to seal. Cut into individual rolls (approx 12) and place on a baking sheet or in a greased rectangular tin. I use dental floss for this, slide it under the dough and then pull both ends together and across each other ~ it will slice straight through it without compressing the dough or dragging out half of the filling.


Cover with plastic film and allow the rolls to rise for about 1 hour, until doubled in size. If you are making the dough a day ahead, cover the rolls in plastic wrap and place in the refrigerator. Remove from the refrigerator about 30 minutes prior to baking the next day. Preheat oven to 190ºC

Bake the rolls for 20 - 30 minutes, or until golden brown.

For the frosting/glaze ~ mix all the ingredients together and beat well. 

Spread the frosting over the rolls while they are still slightly warm.


Before rising


After 50 minutes rising


After baking


Ready to eat!


I've made some progress on my Callicarpa cowl,  I decided to add beads on only alternate mesh panels:


 ~ I can never seem to find a crochet hook with a small enough head when adding beads. So instead I use dental floss to add them quickly and easily. You can see from the above photo where this is going - slide the stitch off the needle then slide the bead down over the stitch and put the stitch back on the needle using the floss.


Tuesday, April 26, 2016

Easy Pitta Breads

Pitta bread, also known as Arabic bread or Lebanese bread is a soft, lightly leavened flat bread. It's so easy to make these at home. They are crisp on the outside and soft and light on the inside and are quick to make as they only require one proving. I make the dough in my bread making machine, on the dough only setting, then remove the dough, shape and bake. If you are making them to toast later, then make sure you don't make them too big if you want to fit them into your toaster.

Pitta Bread

Makes 8 large breads
250 ml warm water
375g strong plain flour (bread flour, you may need a little bit more than this depending on how it absorbs the liquid)
1 teaspoon salt
1 tablespoon oil
1 1/2 teaspoons sugar
1 1/2 teaspoons dried yeast

Mix everything together in a large bowl, turn out onto a floured surface and knead for 5 minutes until the dough is smooth and elastic, if it feels a bit too sticky add a little more flour whilst kneading.


Pop the dough into an oiled bowl, cover and leave in a warm place until it's doubled in size, this will take 45 mins to 1 hour.


When the dough is ready, punch it down in the bowl and lightly knead on a floured surface. Pre-heat the oven to 220 degrees and put a baking tray on the top shelf of the oven to heat. Cut the dough into 8 equal pieces and roll each piece out until it's a few millimetres thick, I lay them on paper lined trays until I'm ready to pop them in the oven.


Remove the tray from the oven, quickly dust with flour and place the breads on it. Bake in the oven for 8 - 10 minutes, they will rise up quite quickly. Remove from the oven and wrap in a tea towel. Repeat with the remaining breads. Enjoy your freshly baked breads.

Monday, April 25, 2016

Anzac Biscuits

Today is Anzac day in New Zealand, so of course I had to bake a batch of Anzac biscuits. 

For people who don't know the story - Anzac biscuits originated during WW1 when wives and mothers would bake these oat biscuits to send to the Anzac troops fighting at Gallipoli.


These economical biscuits did not require any eggs, which were scarce during war time, the biscuits travelled well and didn't spoil due to the lack of egg in the recipe.


I love the coconut/oat flavour of these biscuits. When making them I bake half crispy and half softer due to family preferences. 


Anzac Biscuits:


Pre-heat the oven to 160 deg

Makes approx 18 large cookies.

Mix together in a bowl:

1 cup plain flour
1 cup desiccated coconut
1 cup oats
1 cup soft brown sugar
Melt together in a small saucepan:
125g butter
2 tablespoons golden syrup
2 tablespoons water

Once the butter has melted add 1/2 teaspoon baking soda to the pan and stir.


Mix the wet ingredients into the dry. Form into balls slightly smaller than a golf ball (using wet hands is easier as the mixture is quite sticky).


Place them on a tray and flatten them out.


Bake 15 mins for softer chewy style cookies, 18 - 20 mins for crisp biscuits. Let them cool on the tray for 5 minutes or so before trying to remove them to a cooling rack. They will crisp up more as they cool.


I like my biscuits to be the same size, the way I do this is to use the base of a drinking glass (dipped in cold water) to flatten them out. It's the easiest and quickest way I've found, flatten them out until they are the same size as the base of the glass.


Monday, April 18, 2016

Lemon Curd

There's nothing like home made lemon curd, shop bought just doesn't come near to it in my opinion. This recipe makes a lovely curd that is very smooth in texture yet sharp with the tang of lemon. You can use limes or oranges if you prefer, which I sometimes do. I like lemon & lime curd best. It's not at all complicated, a very simple recipe that uses just 4 ingredients.
My recipe is from an old Woman's Institute Cookery Book. The eggs and lemon juice are measured by equal volumes ~ you will get a good set and to make it even easier it's cooked in the microwave.


Lemon Curd:

You will need 2-3 small to medium size sterilised jars with lids.

100g unsalted butter
350g caster sugar
finely grated rind of 3 lemons
150 ml lemon juice
150 ml beaten eggs

Put the sugar, butter, lemon juice and rind in a large jug or bowl that will fit in your microwave.

Cook on full power for 2 - 3 minutes until the sugar is dissolved and the butter has melted.

Slowly add the beaten eggs to the mixture whilst constantly whisking. Continue cooking in the microwave on full power for 1 minute bursts, reducing to 30 second bursts as the mixture starts to thicken, whisking in between. It doesn't take long so keep your eye on it. Cook until the mixture is thick enough to coat the back of a spoon.

Strain the mixture through a fine sieve into a large jug, this is important as it removes all the bits of rind and any specks of cooked egg.

Carefully pour the hot curd into the warm sterile jars and put the lids on immediately. As it cools it will thicken more. The curd will keep in the fridge, unopened, for 4 weeks. Once a jar is opened use within a week, that's why I try to use smaller jars when making this.


Once the curd is set, and using a doughnut filling piping nozzle - pipe it into some freshly baked lemon sour cream muffins.


Sunday, April 10, 2016

Mocha Cupcakes

Chocolate and coffee what a great combination! These are for the Guild Area open day tomorrow.

I think there's nothing worse than getting one of those delicious looking, expensive, fancy decorated cupcakes and realising you can't eat it because it's basically 50% bland tasteless packet mix cake and 50% over-sugary buttercream.

Another thing that irks me is how you decide to bake some at home, follow a recipe to the t and end up with far less cakes than the recipe states but enough buttercream to frost 10 dozen cupcakes.

Well it's not going to happen here because this is one of my tried and trusted recipes, you will get perfect results with this and just enough buttercream frosting to cover 16-18 cupcakes, (unless you like it piled sky high then I would suggest you double it!)

These sweet little cupcakes are delicious, the cake part is nice and moist, very chocolatey with a background hit of coffee. The buttercream frosting is sweet, as buttercream always is, but this has a good depth of coffee flavour which cuts the sweetness nicely. They are easily decorated with cadbury's flake, as in the picture, but I have also just dusted these lightly with cocoa when I haven't had any flake chocolate.


For the Cupcakes:
1/2 cup hot freshly brewed strong coffee
11/2 teaspoons instant espresso or regular coffee
1/2 cup milk
1 teaspoon vanilla extract/essence
1 1/3 cups standard flour
1/3 cup cocoa
1 teaspoon baking powder
1/2 teaspoon baking soda
1/4 teaspoon salt
100g soft butter
1/2 cup granulated white sugar
1/2 cup light brown soft sugar
1 egg

For the Buttercream:
100g soft butter
2 cups icing sugar
1 teaspoon vanilla extract/essence
2 teaspoons instant coffee powder dissolved in 2 teaspoons hot water

The recipe makes 16 - 18 cakes, you will need a muffin tin/patty tin and paper liners. Pre heat the oven to 170 degrees c.

Mix the espresso powder into the hot coffee and stir until dissolved. Add the milk and vanilla then set aside.

Whisk together the flour, cocoa, baking powder, baking soda and salt.

Next cream the butter and sugars until light and fluffy, add the egg and beat well. Add the flour mixture in three batches, alternating with the coffee/milk mixture. Make sure the mixture is well blended.

Fill the paper cases 2/3 full. Bake the trays for 17 - 20 mins. They are cooked when they look well risen and spring back in the centre when you gently press them.

Cool in the tin for a few minutes then transfer to a wire cooling rack.

While they are cooling make the buttercream:
Whip the butter for 4-5 minutes until it becomes very pale and light, obviously this is much easier using an electric mixer. Then sift in the icing sugar and mix gently to start with, when it has all been incorporated add the vanilla and the coffee and whip/beat it for 2 minutes. It should be soft, light and smooth. Spoon it into a piping bag and decorate your cupcakes however you like. I piped a nice swirl on mine and crumbled some flake chocolate over the tops. The frosting can also be easily spread on with a knife if you prefer not to pipe.

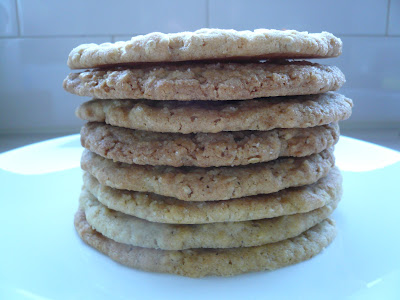
Then came the giant oatmeal cookies, but I'll tell you all about them next time.


Monday, December 7, 2015

Christmas Fruit Mince..

It's December already, can't believe we are so close to Christmas and I feel so unorganized!

So to get me in the Christmas mood I made mincemeat (or fruit mince as it's known as here). I've made it before and blogged about it but I have, for the last 2 years, used a Mary Berry recipe that was in one of her books that I've had for many years but never really looked at. Again, this uses butter instead of suet and there are far less apples to peel, core and chop with this recipe.

Ingredients:
Makes 4 x 370g jars

175g currants
175g sultanas
175g raisins
175g dried cranberries
100g mixed peel
1 small cooking apple, peeled, cored and finely chopped
125g butter, chopped into cubes
225g light brown soft sugar
1/2 teaspoon cinnamon
1 teaspoon mixed spice
finely grated rind and juice of 1 lemon.
100ml rum, brandy or sherry

You will need to use a large pan. Melt the butter over a gentle heat then put in all the other ingredients except the alcohol.

Simmer very gently for 10 minutes then allow to cool completely.

Stir in the alcohol.

Spoon into sterilised jars, seal tightly, label and store in a cool dark place.


Friday, October 16, 2015

Oaty Caramel Squares

Lovely little treats that taste like a flapjack with gooey caramel through them, very naughty but extremely nice!


Recipe
Base:
1 Cup plain flour
1/2 cup Self Raising flour
1/2 cup desiccated coconut
3/4 cup soft brown sugar
1 1/2 cups rolled oats
1 egg, beaten
150g butter, melted and cooled

Topping:
100g butter
1 can condensed milk
2 tablespoons golden syrup

Preheat the oven to 180 degrees
Line a square or rectangular slice tin with non stick baking paper.

Mix all of the dry ingredients for the base together in a large bowl, then stir in the melted butter and egg. The mixture will be moist but crumbly and will hold together if you squeeze it in your hand.

Tip 3/4 of the mixture into the prepared tin and press it flat with your hand.

Put the topping ingredients into a saucepan and cook over a low heat until the butter has melted and everything is mixed together. Pour this over the oaty base then sprinkle the remaining 1/4 of the base mixture over the top. Bake for 30 mins, cool in the tin and chill before cutting into small squares.


The little baby dress is coming along well, I managed to get quite a bit of it done last night and now the hem is in sight.

Sunday, August 30, 2015

Sunday Baking ~ Lady Grey Tea Loaf

A nice light and fruity tea loaf made with simple ingredients, perfect for Sunday afternoons:


Lady Grey Tea Loaf

300 ml strong black tea (lady grey/Earl Grey are nice for this)
300g mixed dried fruit (anything you have to hand, raisins, sultanas, apricots, dates, cranberries etc)
25g mixed peel
60g soft brown sugar
2 tablespoons soft butter.
2 eggs, beaten
275g plain flour + 2.5 teaspoons baking powder, sifted together
1/4 teaspoon salt
1 teaspoon ground ginger
1/2 teaspoon cinnamon
1/2 teaspoon nutmeg
2 teaspoons honey to glaze


Oven preheated to 170 deg.

First brew the tea, then pour into a pan and add the fruit. Bring to the boil then remove from the heat, stir in the sugar and butter and let it cool.

Line a loaf tin with non stick baking paper.

Add the beaten eggs to the fruit mixture. Mix together all the dry ingredients and sift into the fruit mixture, stir in gently but thoroughly, try not to overwork the mixture.

Pour into the tin, smooth the surface and bake for 50 mins- 1 hour. It will be well risen and nicely browned on top, it should feel springy in the middle when you poke it with your finger.

Leave it to cool in the tin for 30 mins then turn it out onto a cooling rack. Warm the honey and brush over the top of the cake.

It will keep in an airtight container for a week and will stay nice and moist. Delicious plain or spread with butter.


Tuesday, April 28, 2015

Winter Warmers....Steamed Jam Roly-Poly, Spinning Shetland, and a Finished Sweater!

Anzac day weekend, we had 3 days of great weather for this time of year but yesterday was very cold and my word did it rain - all night and all day.

When it's cold and grey and it's a Sunday I had to make a nice traditional English pudding. Steamed Jam Roly-Poly, always loved it but I haven't made one for many many years. It's the pudding of my childhood.

It's simple and straight forward to make, however, you will need to get your hands on some suet which is easier said than done here in NZ. English grocers stock it, although it's the vegetarian version but I prefer that anyway.

Since you have the oven on to make one, you may as well make 2 as they freeze very well.

I prefer steaming but some recipes instruct it to be baked. Steaming gives you a nice soft, light sponge rather than the hard and crispy one that you would get from baking. I'm saying steamed but it's not cooked over a pan of boiling water, it's cooked in the oven wrapped in foil over a tray of hot water. For me the jam has always got to be homemade seedless raspberry, nothing else cuts the mustard!


Here's my recipe, makes 1 roll enough for 6-8 servings.

Steamed Jam Roly-Poly

250g self raising flour
50g butter, cold and cubed plus extra for greasing
50g suet
1 tablespoon of sugar
150ml milk plus possibly a little extra
150g jam

Put a roasting tin onto the bottom shelf of the oven and put another shelf directly above it. Fill the tin 2/3 full with boiling water from the kettle and preheat the oven to 180 deg/160 fan/ gas 4.

Tear off a large sheet of both aluminium foil and baking parchment. Lay the parchment on top of the foil and grease it thoroughly with butter.

Put the flour into a bowl and rub in the butter until it disappears, then stir in the suet and 1 tablespoon of sugar.

Add the milk and mix in with a knife, you want a very soft dough, you may have to add a little more milk depending on your flour.

Tip the dough out onto a floured surface and bring it together until smooth. Roll it out into a square about 25x25cm.

Spread the jam over the surface leaving a gap of about 2 cm all around the edges.

Roll it up nice and firmly but don't squeeze it or put too much pressure on as you will force the jam out! Pinch the the edges together to seal and carefully lift it onto the greased paper join side down.

Loosely bring up the paper and foil and scrunch it together to seal all along the edges. It will rise quite a bit during cooking so don't wrap it tightly. Place the foil parcel on the shelf directly above the tin of water and cook for 60-80 minutes.

Remove from the oven and let the pudding sit for 10 minutes before unwrapping it. Slice thickly and serve warm with custard. If you want to freeze it just let it go cold, wrap it in fresh baking paper and foil and freeze.


Now the sweater which is a birthday gift for my Brother. I used some Shetland that I spun about 4 or 5 years ago when I first started spinning. I had forgotten about that yarn and I had more than a sweaters worth, that's what happens when you start looking through your stash, you find things long forgotten about! The pattern is Riddari, it was a very enjoyable knit:

This will keep him warm during the Otago winter. I've already got requests from hubby and both my son's for one of these.


So, after knitting the Riddari sweater I felt inspired to spin my remaining Shetland combed top. This is a fingering/4 ply weight yarn and the colour is a light fawn. 2 skeins done already, I'm aiming for a sweaters worth and thinking of over-dyeing some for a colour work sweater:


Here's Pandora keeping her eye on things, she's wondering if she can steal some fibre without me noticing.