Search This Blog

Showing posts with label cowl. Show all posts

Sunday, May 1, 2016

Cinnamon Rolls with Cream Cheese Glaze

I seem to be on a bit of a bread making drive at the moment. Last week Pitta breads, this weekend I made fruited buns and today cinnamon rolls. Here's the recipe, it's quite a long one, but most of the time you aren't actually doing anything:


For the rolls:
2/3 cup milk
1 package active dry yeast (or 2 1/4 tsp)
6 Tbsp unsalted butter, room temperature and cut into small pieces
1/4 cup sugar
3/4 tsp salt
1 large egg
3 cups plus 2 Tbsp high grade flour

For the Filling:
50g butter, melted
2 Tbsp cinnamon
1/2 cup soft brown sugar

For the Frosting:
100g cream cheese
50g soft butter
1 cup icing sugar, sifted
1/2 teaspoon vanilla extract

Warm the milk and sprinkle the yeast over it, let it sit until it begins to get foamy. About 5 minutes

In the bowl of a stand mixer, stir together the butter, sugar, salt, and egg.

Fit the mixing bowl onto the mixer with the dough hook. With the mixer on the lowest setting, pour in the milk/yeast mixture and the flour. Increase speed to medium and let the dough knead for about 5 minutes until it forms a soft sticky dough. The mixture will seem quite wet at first, but will form a smooth soft dough once kneaded. If the mixture is too wet after kneading, add more flour a little at a time until a soft but sticky dough forms.

Let the dough rest, covered with a damp tea towel for 10 minutes.

Roll it out into a rectangle approx 15 x 10".

Brush with the melted butter and sprinkle over the brown sugar and cinnamon. You can add a cup of dried fruit at this stage if you like.

Roll the dough tightly into a large tube starting at the wide side. Pinch the dough shut to seal. Cut into individual rolls (approx 12) and place on a baking sheet or in a greased rectangular tin. I use dental floss for this, slide it under the dough and then pull both ends together and across each other ~ it will slice straight through it without compressing the dough or dragging out half of the filling.


Cover with plastic film and allow the rolls to rise for about 1 hour, until doubled in size. If you are making the dough a day ahead, cover the rolls in plastic wrap and place in the refrigerator. Remove from the refrigerator about 30 minutes prior to baking the next day. Preheat oven to 190ºC

Bake the rolls for 20 - 30 minutes, or until golden brown.

For the frosting/glaze ~ mix all the ingredients together and beat well. 

Spread the frosting over the rolls while they are still slightly warm.


Before rising


After 50 minutes rising


After baking


Ready to eat!


I've made some progress on my Callicarpa cowl,  I decided to add beads on only alternate mesh panels:


 ~ I can never seem to find a crochet hook with a small enough head when adding beads. So instead I use dental floss to add them quickly and easily. You can see from the above photo where this is going - slide the stitch off the needle then slide the bead down over the stitch and put the stitch back on the needle using the floss.


Sunday, April 24, 2016

Oscar Wabbit, Spinning for Socks and a Cowl.

I've been grooming Oscar every 2-3 days to keep his coat nice, but I noticed over the last week his fibre is starting to shed when I comb him and he has been feeling the heat, so obviously it's time to pluck him. This doesn't hurt the rabbit, you are just removing the old coat and leaving the new short coat behind. It was rather time consuming as I went slowly, not wanting to frighten him with it being the first time either of us had gone through this process, but he was happy enough and enjoyed the cuddles and attention.
Here he is before plucking:


And after, notice how dark his new short coat looks compared to his old one:


Here's the box of treasure, it weighs just 28g.


The good thing about plucking as opposed to cutting the fibre is that you get the full staple length, whereas in cutting I would not dare cut near to his skin and would be lucky to get a 2" staple length.

I didn't cut the fibre from his ears or cheeks, but I did clip his legs and paws and trimmed his claws which were as sharp as needles before. 

Hopefully he will feel much cooler and will be easier to groom. Now I'm going to spin some of the fibre ~ another bonus being that it's already clean and not full of v.m...... unlike the alpaca's!


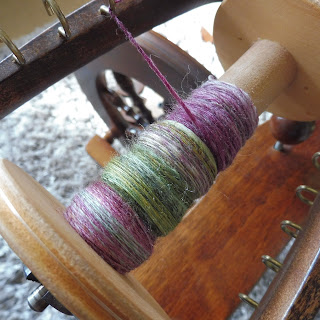
I started spinning some Corriedale sock blend fibre that I dyed a while back, more Autumnal colours:


Then I cast on for a cowl, and learnt a new method of doing a provisional cast on in the process:


The pattern is Callicarpa
The yarn is Sublime Yarns Extra Fine Merino Dk in Purple Plum.
Here's a link to the winding on provisional cast on tutorial.

And that's all for now folks!